Finished - Vogue 1548 - the DVF wrap in luscious merino!
I try to buy fabric with a purpose these days, but occasionally I find a treasure that must come home, without firm plans. A few months ago I found a beautiful deep purple merino-lycra knit at The Fabric Store, printed with a very pale lilac and pink geo design and I'm pretty sure I squealed as I snatched it off the table. I had no idea what it would become other than mine. Shortly after the Dressmakers Do was announced - another social sewing event in Melbourne where one makes a fabulous outfit and spends the evening eating, drinking and examining others hems.

Gorgeously generous Helen had been kind enough to loan me her copy of the iconic and fabulous Vogue 1548 pattern, one of the Dianne Von Furstenberg range from the late 70's, and I decided that the stars were aligning between event, fabric and pattern.

It's a great pattern. I can't comment on how similar it is to some of the current Vogue wrap dress patterns, having never made them, but it's drafted beautifully. I'm fortunate that with only a few slight changes I was able to make it work. According to the size chart I'm about 5 sizes too big for this size 10 (no exaggeration!!). I whipped up a quick and dirty muslin of the bodice, using a variety of knit cotton-lycra scraps, and decided that the fit in the shoulders was pretty good (the hardest part to fit I reckon) and with a little extra room in the waist I'd be good to go. Pics of pattern adjustments are at the end of the post (this is a bit of a long one!).


The merino was a bit of a beast to sew at times due to it's insistence on curling, but I got there. It behaved beautifully otherwise, even when I had to do a little unpicking on the facing to address some gaping.
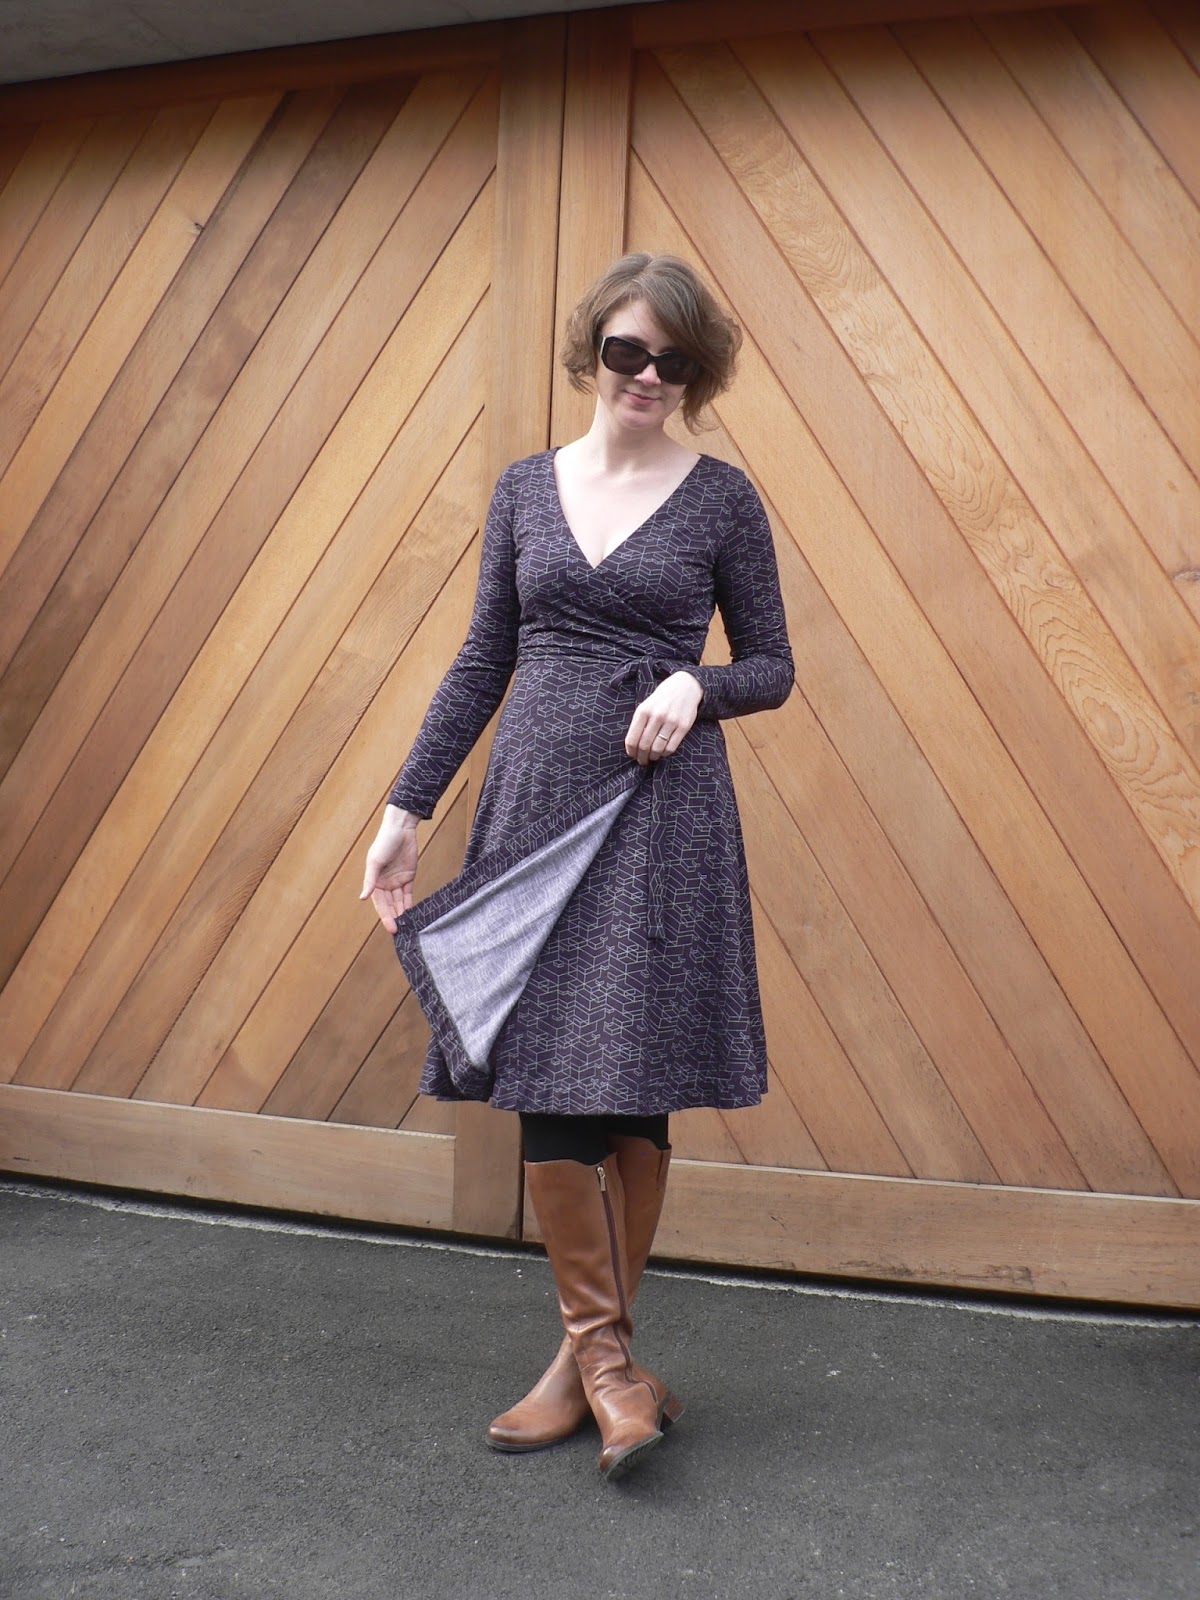
The skirt is very full, and for one crazy minute I thought about subbing it out with the Named Olivia skirt as I worried it would add extra bulk around my hips. Of course I came to my senses. That Dianne! She knows what she's doing - all the volume is of course at the hemline, with nothing at the waist and hips! I did have to remove some of the fullness in the skirt (20% - method described below) to get it to fit on my fabric, and I was a little worried it would affect the skirt overlap, but it was fine. No wardrobe malfunctions and a pretty good twirl'n'swish factor remains.


Not gonna lie, there's a fair bit of decolletage on view. I did have some rather disappointing gaping but managed to McGyver an adjustment at the shoulder seams taking it in by a good 3cm at the neckline tapering to nothing at the armscye seam to bring it up. Next time I'll take a wedge out of the front bodice wrap edges at the collarbone and hope that solves the problem in a more elegant fashion! I also attached the facing using only a 3/8 inch seam allowance rather than the drafted 5/8 inch, just to have a smidge more coverage.


I wasn't up for using most of the methods described by the pattern (hand stitching hems and facings, double row of stitching for side seams). I did stablise the skirt using knit stay tape but found it very hard to then ease in the bodice, and next time I would stablise the seam after attaching the bodice, with elastic, similar to the method used in the Olivia. I'm also pretty sure I set the sleeves in flat, then just sewed up the sleeves and side seams in one pass.

I'm really happy with the fit for a single sized pattern!


Summary of adjustments made:
- added an extra 1.5cm to each side-seam at the waistline, tapering to nothing at the armscye:

- cut the back bodice and the back facing on the fold but about 5mm in from the folded edge to sneak in another 1cm width in the back.
- attached neckline facing using a 3/8 inch (1cm) SA rather than 5/8 for a little extra coverage.
- took a wedge of about 3cm in total out of the neckline at the shoulders to correct gaping. Next time I think I need to make a pattern adjustment to the bodice and facing like this:


- removed 20% of the volume of the skirt at the hemline. It's pretty close to a circle skirt as drafted, so I had to reverse engineer it to ensure the volume was removed evenly and didn't affect the drape. To calculate the volume I measured how many cm the back skirt piece was overhanging off my fabric and calculated the ratio of this measurement to the total measurement of the hemline (this gave me the 20%). I divided the skirt pieces into 5 to slash and overlap. Each overlap was therefore 5% of the total amount I needed to reduce the volume by. For the back piece I used the CB as my starting point as it was the grainline, and for the front piece I started from the beginning of the facing fold-line as it was also parallel to the grainline.

These really were all very straightforward and pretty forgiving changes - gotta love sewing with a lycra blend!
The other little method I used was a cool little hemming trick I saw on Instagram via Faberwood and Sewing Is Therapy. It's a little bit like a blind hem in theory and creates a faux band finish that is lovely and stretchy. I'll try to explain it...
- consider finishing the raw edge with the overlocker - I didn't with this version but have with subsequent cuffs and it does look a bit nicer. This step can be done before closing up the sleeve seam
- fold up the desired seam allowance and press
- fold it up a second time, so the raw edge of the hem is right on the edge (this is similar to what you do with a blind hem)
- use a very shallow zig zag to catch just the raw edge and a tiny bit of the folded fabric. When you look from the right side there's a faux seam which is the fold. It's very quick and easy and stretchy! Love it!


Goodness! What an epic post for an epic frock! I just adore this dress. It's one of my favourite garments ever. I feel completely fabulous in it! I think a silk jersy 3/4 sleeve version will be my next iteration. I'm making the big claim that I have my own genuine DVF frock now. My friend has a RTW version, made in China - both designed by the same person but sewn by different people - who's to say mine is any less genuine then? ;)

photo credits to Anna xx
Comments
Post a Comment